The Indispensable Cotter Pin: A Comprehensive Guide for Engineers and DIY Enthusiasts
Introduction
Cotter pins, also known as split pins, are seemingly simple yet remarkably effective mechanical fasteners that play a crucial role in various industries. From automobiles and machinery to aircraft and plumbing, cotter pins ensure the safety and reliability of countless applications. This comprehensive guide will delve into the anatomy, functions, and proper usage of cotter pins, empowering engineers and DIY enthusiasts alike with the knowledge they need to harness the full potential of these unsung heroes.
Anatomy of a Cotter Pin
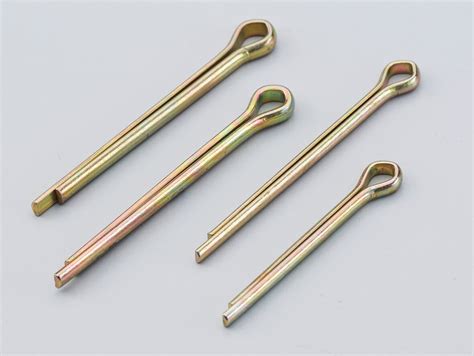
A cotter pin consists of a cylindrical body with a split or open end. This split end, which is typically bent outwards, forms the head, while the remaining portion forms the shank. The diameter of the body is usually larger than the diameter of the hole in which it is inserted, ensuring a snug fit.
Functions of Cotter Pins
Cotter pins serve two primary functions:
-
Securing Nuts and Bolts: When inserted through the hole of a nut and bolt, a cotter pin prevents the nut from loosening or unscrewing under the influence of vibration or torque.
-
Preventing Axial Movement: When inserted through a clevis or fork end, a cotter pin prevents axial movement of the attached components, ensuring that they remain securely in place.
Types of Cotter Pins
Cotter pins come in various types, each tailored to specific applications:
-
Standard Cotter Pins: These are the most common type of cotter pins, with a straight body and a single split end.
-
Hairpin Cotter Pins: These cotter pins have a U-shaped body, with both ends bent outwards to form two heads.
-
Double-Split Cotter Pins: These cotter pins have two split ends, allowing for more secure locking and preventing accidental dislodgement.
-
Quick-Release Cotter Pins: These cotter pins feature a slotted head that enables quick removal using a screwdriver or other tool.
How to Use Cotter Pins
Properly inserting a cotter pin is essential for ensuring its effectiveness:

-
Select the Correct Size: Choose a cotter pin that is long enough to protrude through the hole by at least 1/4 inch.
-
Open the Split End: Using pliers or a cotter pin opener, spread the split end of the pin apart.
-
Insert the Pin: Insert the pin through the hole, with the split end facing the threaded side of the bolt.
-
Bend the Legs: Bend the protruding legs of the cotter pin outwards, ensuring that they are spread evenly.
-
Clip the Excess: If the legs extend too far, use pliers to clip off the excess, leaving approximately 1/8 inch of space between the bent ends and the workpiece.
Common Mistakes to Avoid
To ensure the longevity and effectiveness of cotter pins, certain common mistakes should be avoided:
-
Using an Undersized Pin: A cotter pin that is too small will not provide sufficient holding power and may fail prematurely.
-
Overtightening the Pin: Excessive tightening of the cotter pin can weaken the metal and cause it to break.
-
Installing the Pin Backwards: The split end of the cotter pin should always face the threaded side of the bolt to prevent it from catching on other components.
-
Inserting the Pin Too Deeply: The cotter pin should not protrude too far into the hole, as this can hinder its ability to secure the nut.
-
Reusing Cotter Pins: Cotter pins are designed for single-use and should not be reused, as they may have been weakened from prior use.
Why Cotter Pins Matter
Cotter pins may seem like humble components, but they play a disproportionately significant role in ensuring the safety and reliability of countless applications:

-
Prevent Catastrophic Failure: By preventing nuts and bolts from loosening, cotter pins safeguard against catastrophic failures that could have dire consequences, especially in critical applications such as aircraft and machinery.
-
Reduce Maintenance Costs: By securing components securely, cotter pins reduce the need for frequent maintenance and repairs, saving both time and money.
-
Enhance Safety: The use of cotter pins in locking devices and safety mechanisms contributes to overall safety by preventing accidental disengagement or movement.
-
Ensure Compliance: In regulated industries such as aviation and manufacturing, the use of cotter pins may be mandated by safety codes and standards.
Benefits of Using Cotter Pins
The use of cotter pins offers numerous benefits:
-
High Strength and Durability: Cotter pins are manufactured from high-strength steel or stainless steel, ensuring durability and resistance to wear and tear.
-
Simple and Easy Installation: The straightforward installation process makes cotter pins ideal for both experienced engineers and DIY enthusiasts.
-
Low Cost and Accessibility: Cotter pins are readily available at hardware stores and industrial suppliers at an affordable price.
-
Versatile Applications: The wide range of types and sizes makes cotter pins suitable for a diverse range of applications, from automotive repairs to industrial machinery.
Stories and Lessons Learned
To illustrate the importance of proper cotter pin usage, here are a few stories and the lessons they imparted:
Story 1: A maintenance technician was tasked with repairing an industrial fan that had been experiencing excessive vibration. Upon inspection, it was discovered that the cotter pin securing the fan blade to the shaft had failed, causing the blade to wobble. The technician replaced the cotter pin with a new one, ensuring the fan blade was securely locked in place, effectively eliminating the vibration issue.
Lesson Learned: The failure of a seemingly insignificant cotter pin can lead to costly damage and downtime. Regular inspection and replacement of cotter pins are crucial for preventing such failures.
Story 2: A homeowner was installing a new water heater and used a cotter pin to secure the safety valve. Unfortunately, the homeowner did not open the split end of the cotter pin sufficiently, causing it to slip out of place. As a result, the safety valve failed to activate, leading to a flooded basement.

Lesson Learned: Proper installation of cotter pins is paramount. Ensure the split end is fully opened and the legs are bent outward to prevent accidental dislodgement.
Story 3: An aircraft mechanic was inspecting a plane before takeoff and noticed that one of the cotter pins securing a control linkage was missing. The mechanic promptly replaced the cotter pin, preventing a potentially catastrophic failure that could have endangered the lives of the passengers and crew.
Lesson Learned: Cotter pins are critical components in safety-critical applications. Their presence and proper installation should never be compromised.
Step-by-Step Approach to Using Cotter Pins
For foolproof installation of cotter pins, follow these steps:
-
Select the Right Cotter Pin: Determine the appropriate diameter and length of the cotter pin based on the application.
-
Open the Split End: Use pliers or a cotter pin opener to spread the split end of the pin wide enough for easy insertion.
-
Insert the Pin: Insert the cotter pin through the hole, ensuring the split end faces the threaded side of the bolt or the appropriate direction for the application.
-
Bend the Legs: Using pliers or a hammer, bend the protruding legs of the cotter pin outwards, ensuring they are spread evenly.
-
Clip the Excess: If the legs extend too far, use pliers to clip off the excess, leaving approximately 1/8 inch of space between the bent ends and the workpiece.
Tables for Reference
Table 1: Cotter Pin Types and Applications
| Type |
Description |
Applications |
| Standard Cotter Pin |
Straight body with single split end |
Securing nuts and bolts |
| Hairpin Cotter Pin |
U-shaped body with two split ends |
Fork ends, clevis joints, and other applications where axial movement needs to be prevented |
| Double-Split Cotter Pin |
Straight body with two split ends |
High-vibration environments, heavy-duty applications |
| Quick-Release Cotter Pin |
Slotted head for quick removal |
Applications where frequent access is required |
Table 2: Cotter Pin Diameters and Hole Sizes
| Cotter Pin Diameter (in) |
Hole Diameter Range (in) |
| 0.063 |
0.106 - 0.138 |
| 0.078 |
0.125 - 0.164 |
| 0.093 |
0.141 - 0.188 |
| 0.110 |
0.156 - 0.219 |
| 0.125 |
0.172 - 0.234 |
Table 3: Cotter Pin Material Options
| Material |
Properties |
| Steel |
Strong, durable, and cost-effective |
| Stainless Steel |
Corrosion-resistant, suitable for outdoor and wet environments |
| Copper |
Non-magnetic and suitable for electrical applications |
| Aluminum |
Lightweight and suitable for applications requiring low magnetic permeability |
Summary
Cotter pins, though often overlooked, are indispensable mechanical fasteners that play a crucial role in ensuring the safety, reliability, and longevity of countless applications. By understanding their anatomy, functions, and proper usage, engineers and DIY enthusiasts can harness the full potential of these humble yet indispensable components. Always prioritize using the correct size and type of cotter pin, install it properly, and inspect it regularly to prevent costly failures and ensure the safe and efficient operation of your equipment.
