A Comprehensive Guide to Replacing Hub Bearings: Restoring Smooth and Safe Rides
Introduction
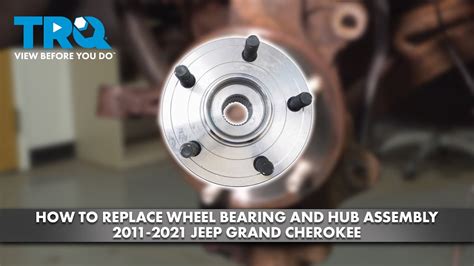
Hub bearings play a crucial role in vehicles by supporting the wheels and facilitating smooth rotation. Over time, bearings can wear out due to factors like friction, corrosion, and wear and tear. When this occurs, replacing the hub assembly is necessary to ensure optimal performance. This guide will delve into the steps, tools, and techniques involved in replacing hub bearings, empowering DIY enthusiasts and mechanics alike to tackle this task with confidence.
Table 1: Common Symptoms of Faulty Hub Bearings
| Symptom | Description |
|---|---|
| Grinding or humming noises | Audible noise emanating from the hub area |
| Excessive vibrations | Noticeable shaking or vibration while driving |
| Loose steering or poor handling | Reduced responsiveness and difficulty in controlling the vehicle |
| Uneven tire wear | Premature or irregular wear pattern on tires |
Why It Matters: Neglecting faulty hub bearings can lead to severe consequences such as wheel detachment, loss of control, and potential accidents. Regular maintenance and timely replacement ensure safety and prevent costly repairs down the line.
Benefits of Replacing Hub Bearings
-
Enhanced Vehicle Safety: Worn bearings compromise steering and handling, increasing the risk of accidents. Replacing them restores optimal control and reduces the chances of road emergencies.
-
Improved Performance: New bearings facilitate smooth wheel rotation, reducing friction and vibrations, thereby improving overall vehicle performance and driving experience.
-
Extended Tire Life: Faulty bearings cause uneven tire wear, reducing their lifespan. Replacing them ensures even contact and prolongs the life of your tires.
-
Reduced Maintenance Costs: Addressing bearing issues promptly can prevent more significant and expensive problems in the future, such as transmission failures or suspension damage.
Transition: Tools and Materials Required
Before embarking on the bearing replacement process, gather the necessary tools and materials to ensure a seamless and effective task completion.
Essential Tools
-
Jack and jack stands: To safely lift and support the vehicle.
-
Lug wrench: To remove the lug nuts securing the wheel.
-
Socket wrench and sockets: To disassemble various components, including the caliper mounting bolts and spindle nut.
-
Impact wrench (optional): For quicker and more efficient disassembly of stubborn bolts.
-
Hammer or slide hammer: To remove the old bearing from the hub assembly (if required).
Materials
-
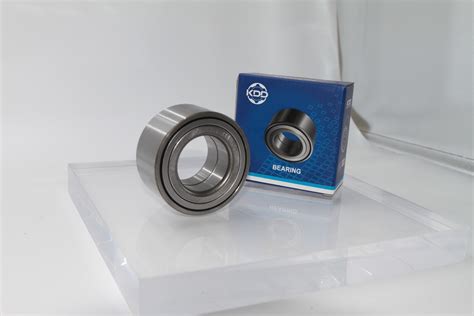
New hub assembly: Factory-assembled units that include new bearings, seals, and hardware. These vary based on vehicle make and model.
-
Anti-seize compound: To prevent corrosion and facilitate future disassembly.
-
Wheel bearing grease: To lubricate the new bearing and ensure smooth operation.
-
Brake cleaner: To clean the brake rotor and caliper mounting surface.
Step-by-Step Guide to Replacing Hub Bearings
Safety Precautions
- Park the vehicle on a flat and stable surface.
- Engage the parking brake to prevent movement.
- Use chocks to secure the wheels opposite the side being worked on.
- Wear safety glasses to protect your eyes from flying debris.
Step 1: Prepare the Vehicle
- Use a lug wrench to loosen the lug nuts on the wheel associated with the faulty bearing.
- Jack up the vehicle and secure it with jack stands, ensuring stability.
Step 2: Remove the Wheel
- Completely remove the loosened lug nuts and detach the wheel from the hub assembly.
Step 3: Remove the Brake Caliper
- Locate the caliper mounting bolts and remove them using a socket wrench.
- Carefully lift the caliper off the brake rotor without disconnecting the brake hose.
- Secure the caliper out of the way using a bungee cord or wire.
Step 4: Remove the Brake Rotor (optional)
- Some vehicles require removing the brake rotor for better access to the hub assembly.
- Remove the mounting bolts securing the rotor to the hub and slide it off.
Step 5: Remove the Spindle Nut and Disassemble Hub Assembly
- Use a socket wrench with a deep socket to remove the spindle nut.
- Carefully pull the hub assembly straight out from the spindle.
- If the bearing is not integrated into the hub assembly, use a hammer or slide hammer to remove it from the hub.
Step 6: Inspect the Spindle and Clean Surfaces
- Inspect the spindle for any damage or wear. Clean it thoroughly using brake cleaner.
- Also, clean the mounting surface of the caliper and brake rotor.
Step 7: Install the New Hub Assembly
- Apply a thin layer of anti-seize compound to the spindle and the hub assembly contact points.
- Press the new hub assembly straight onto the spindle by hand as far as possible.
- Use a hammer or press to gently tap the hub further onto the spindle until it seats fully.
Step 8: Tighten the Spindle Nut
- Thread the spindle nut back onto the spindle by hand.
- Use a torque wrench to tighten the nut to the specified torque value as per the vehicle's repair manual.
Step 9: Reinstall Brake Components
- If the brake rotor was removed, reinstall it now and secure it with its mounting bolts.
- Lift the caliper back into position and tighten the caliper mounting bolts using a torque wrench.
Step 10: Install the Wheel and Tighten Lug Nuts
- Place the wheel back onto the hub assembly.
- Hand-tighten the lug nuts as much as possible.
- Use a lug wrench to further tighten the lug nuts, following the manufacturer's recommended torque sequence and torque specifications.
Step 11: Lower Vehicle and Test
- Lower the vehicle back to the ground and remove the jack stands.
- Fully tighten the lug nuts using a torque wrench.
- Take the vehicle for a test drive to ensure proper operation and absence of any unusual noises or vibrations.
Troubleshooting
Common Mistakes to Avoid
-
Overtightening lug nuts: Avoid excessive tightening, as it can damage the wheel studs or bolts.
-
Not lubricating the bearing: Ensure adequate lubrication with the specified grease to prevent premature bearing failure.
-
Ignoring torque specifications: Follow the vehicle's repair manual for proper torque values for all bolts and nuts.
-
Using worn or damaged tools: Utilize high-quality tools in good condition to prevent injury or further damage.
Tips and Tricks
-
Use a impact wrench: This tool can make disassembly quicker and easier, especially for stubborn bolts.
-
Apply anti-seize compound: This simple step can significantly simplify future maintenance and prevent corrosion.
-
Inspect the spindle: Check for any
